

This lesson is made with PSPX9
But is good with other versions.
© by SvC-Design

Materialen Download :
Here
******************************************************************
Materials:
kleuren.jpg
Leny-deco.png
Leny-deco1.png
Leny-vrouw143a.png
Silvie_Mask_Deco2.jpg
tekst-604 - what you allow - Ri@.pspimage
******************************************************************
Plugin:
Plugin - [AP Lines] - Lines Silverlinning – dotty grid
plugin - Filter Unlimited 2.0. - Penta - Drag
Plugin - Filter Xero - Clarity
******************************************************************
color palette
:

******************************************************************
methode
When using other tubes and colors, the mixing mode and / or layer coverage may differ
******************************************************************
General Preparations:
First install your filters for your PSP!
Masks: Save to your mask folder in PSP, unless noted otherwise
Texture & Pattern: Save to your Texture Folder in PSP
Selections: Save to your folder Selections in PSP
Open your tubes in PSP
******************************************************************
We will start - Have fun!
Remember to save your work on a regular basis
******************************************************************
1.
Set the foreground color to e7dbe6
Background color on ac2c97
2.
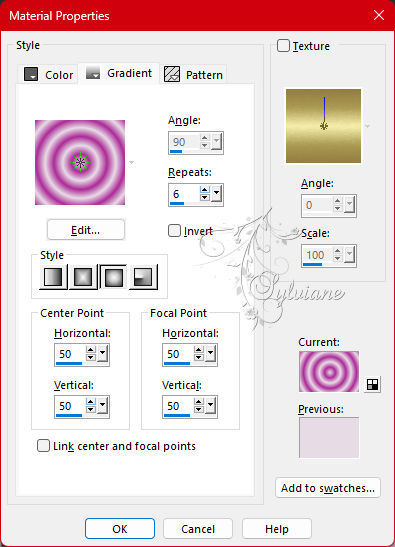
Foreground on Gradient Sunburst.

3.
Open a new transparent image of 500-300 px
4.
Fill the image with the gradient
5.
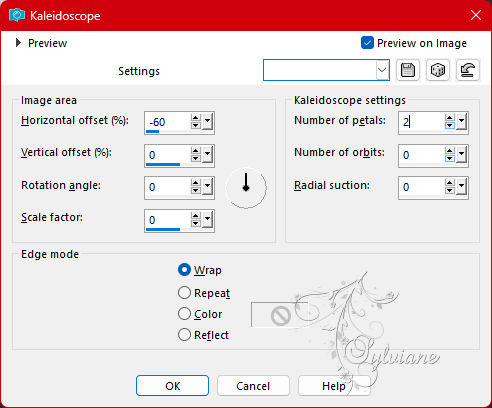
Effects - Reflection Effects – Kaleidoscope
6.
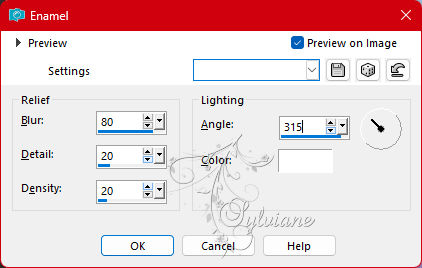
Effects - Artistic Effects - enamel
7.
Image – Add Borders –symmetric - 20 pixels – color: white
8.
Effects - Image Effects - Seamless Tiling

9.
Activate your magic wand and set Mode to Add (shift) - Tolerance to 5, the rest is good.
Select the 4 white rectangles

10.
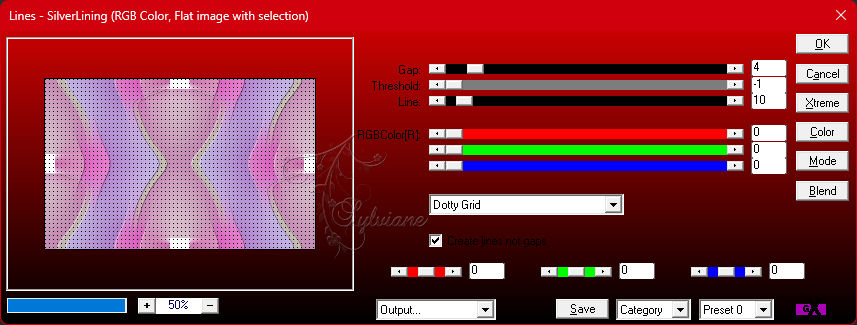
Plugin - [AP Lines] - Lines Silverlinning – dotty grid
11.
Selections - Select none
12.
Image – Add Borders –symmetric - 40 pixels - color: black
13.
Effects - Image Effects - Seamless Tiling

14.
Change the gradient to the foreground color
15.
Select the 4 black rectangles

Fill them with the new gradient
16.
Selections – Promote selections to layer
17.
Selections - Select none.
18.
Image - Resize 50%- resize all layers unchecked.
They look good right away
19.
Effects - Edge Effects - Enhance more
20.
Layers - merge - merge down
21.
Image – Add Borders –symmetric - 60 pixels – color: black
22.
Effects - Image Effects - Seamless Tiling

23.
Select the 4 black rectangles again
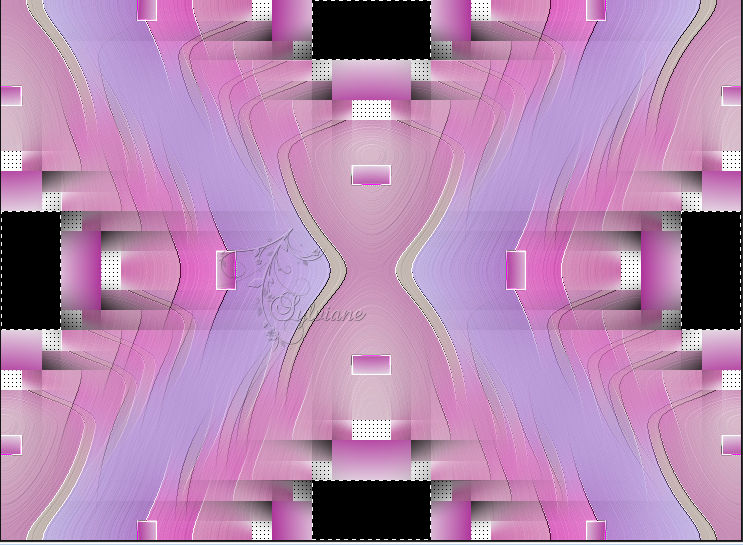
24.
Layers - New raster layer
25.
Fill them with the gradient
26.
Selections - Select none.
27.
Image - Resize 50 % - resize all layers unchecked.
They look good right away
28.
Effects - Edge Effects - Enhance more
29.
Layers - merge - merge down
30.
Image – Add Borders - color#ac2c97
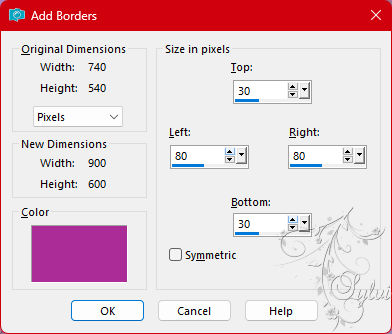
31.
Effects - Image Effects - Seamless Tiling

32.
Plugin - Filter Unlimited 2.0. - Penta - Drag
Set the slider to 142
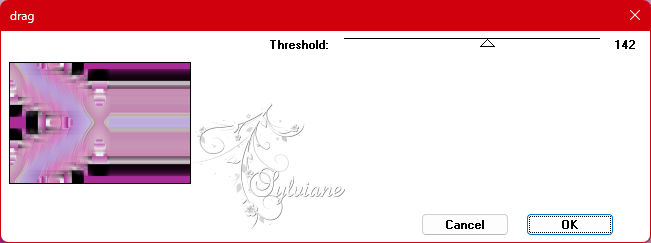
33.
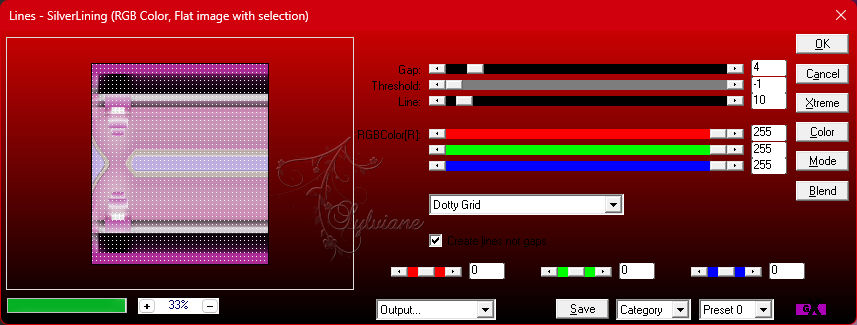
Select above and below the purple bars
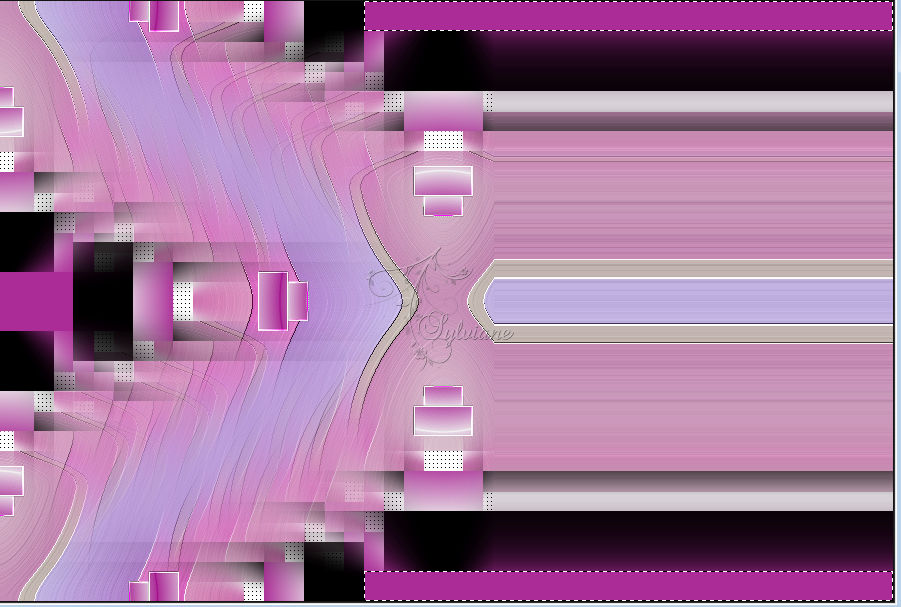
34.
Plugin - [AP Lines] Lines Silverlinning – dotty grid
Set the settings as below (the colors will change)
Selection - Select None
35.
Layers - New raster layer
36.
Fill the layer with white
37.
Layers - New Mask Layer - From Image - Silvie_Mask_Deco2

38.
Layers - Merge - merge group.
39.
Layer Opacity 72 - Blend Mode on Luminance Legacy
40.
Layers - Duplicate
41.
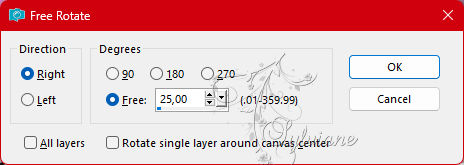
Image - Rotate - free rotate
42.
Set the opacity of this layer to 36
43.
Take tube Leny-female143a
Edit - Copy
Back to your image
Edit - Place as a new layer on your image.
44.
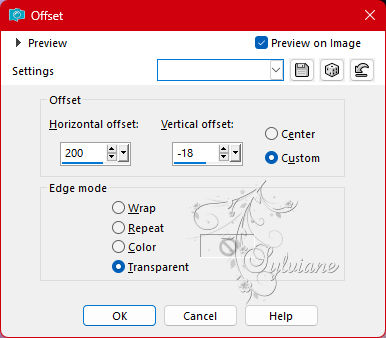
Effects - Image Effects – Offset
45.
Effects - 3D Effects - Drop Shadow
-7/-12/35/20 color:#000000
46.
Tube Leny deco
Edit - Copy
Back to your image
Edit - Place as a new layer on your image.
47.
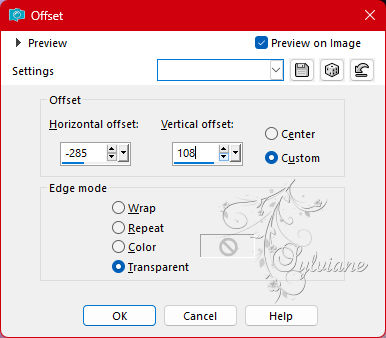
Effects - Image Effects - Offset
48.
Tube text-604 - what you allow - Ri@
Edit - Copy
Back to your image
Edit - Place as a new layer on your image.
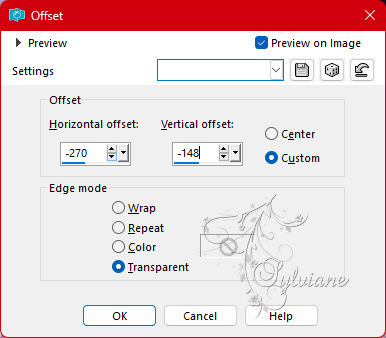
49.
Effects - Image Effects - Offset
50.
Effects - 3D Effects - Drop Shadow
-3/-3/35/5 color:#000000
51.
Layers - Merge - Merge all layers.
52.
Image – Add Borders –symmetric - 2 pixels - background color
Image – Add Borders –symmetric - 10 Pixels - Foreground Color
Image – Add Borders –symmetric - 2 pixels - background color.
Image – Add Borders –symmetric - 20 Pixels - foreground color
Activate your magic wand and set Tolerance back to 0
Select the border.
53.
Fill the border with the gradient

54.
Selections - Invert
55.
Effects - 3D Effects - Drop Shadow
0/0/35/20 color:#000000
56.
Selections - Select none
57.
Image – Add Borders –symmetric - 2 pixels – color: background
58.
Selections - Select all
59.
Image – Add Borders –symmetric - 45 pixels – color: white
60.
Selections – Invert
61.
Repeat the drop shadow (still looks good)
62.
Selections - Select none,
63.
Image – Add Borders –symmetric - 2 pixels - background color
64.
Tube Leny deco1
Edit - Copy
Back to your image
Edit - Paste as new layer on your image.
Place it where you like it
65.
Layers - Duplicate
And watch where you put it.
66.
Plugin - Filter Xero - Clarity
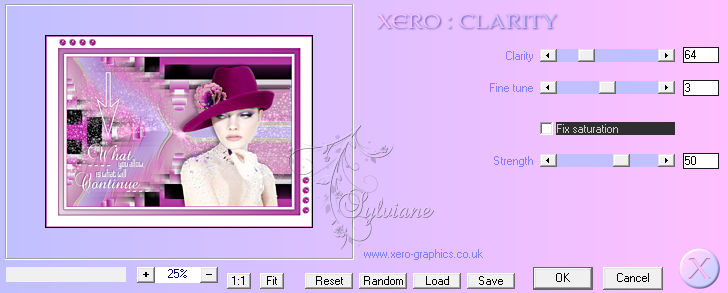
Layer – merge – merge all (flatten)
67.
Place your name or watermark on the image
Layer – merge – merge all (flatten)
68.
Save as jpg.
Back
Copyright Translation 2023 by SvC-Design